


A power supply can quietly fail and cause chaos in your PC, no boot, sudden shutdowns during tasks, or even a burning smell from the pc case. What seems like a major hardware failure is often just a weak or failing power supply unit (PSU) struggling to deliver stable power.
The problem is that most people skip testing the PSU entirely. They blame the motherboard, reinstall Windows, or waste money on new RAM when the real issue was the power supply all along.
In this guide, we’ll walk you through four reliable methods to test a power supply, from a quick two-second paperclip trick to a proper multimeter voltage check. Whether you’re a complete beginner or an experienced builder, you’ll know exactly what to do by the end.
Signs Your Power Supply May Be Failing
Before reaching for a paperclip or multimeter, it’s worth confirming the PSU is actually suspect. Here are the most common warning signs:
- PC won’t power on at all, despite power being connected
- Random shutdowns or restarts, especially under heavy GPU or CPU load
- Blue screens of death (BSODs) with no apparent software cause
- Burning smell or unusual noise coming from the PSU area
- Fans, drives, or the GPU not receiving power
- Voltage instability shown in monitoring software like HWMonitor or AIDA64
If you’re seeing two or more of these symptoms, there’s a strong chance the power supply is at fault. Let’s get it tested.
What You’ll Need Before You Start
Depending on which method you choose, you may need the following:
- A metal paperclip or a PSU jumper tool (cheap and safer)
- A digital multimeter (set to DC voltage mode)
- A dedicated PSU tester (costs £5–£15, readily available on Amazon)
- Stress-testing software such as Prime95 or FurMark (free)
- A flat surface away from static-prone materials
Safety note: Never open the PSU casing. Internal capacitors can store lethal voltage even when the unit has been unplugged for hours. All testing power supplies is done externally.
Method 1: The Paperclip Test (Quickest Basic Check)
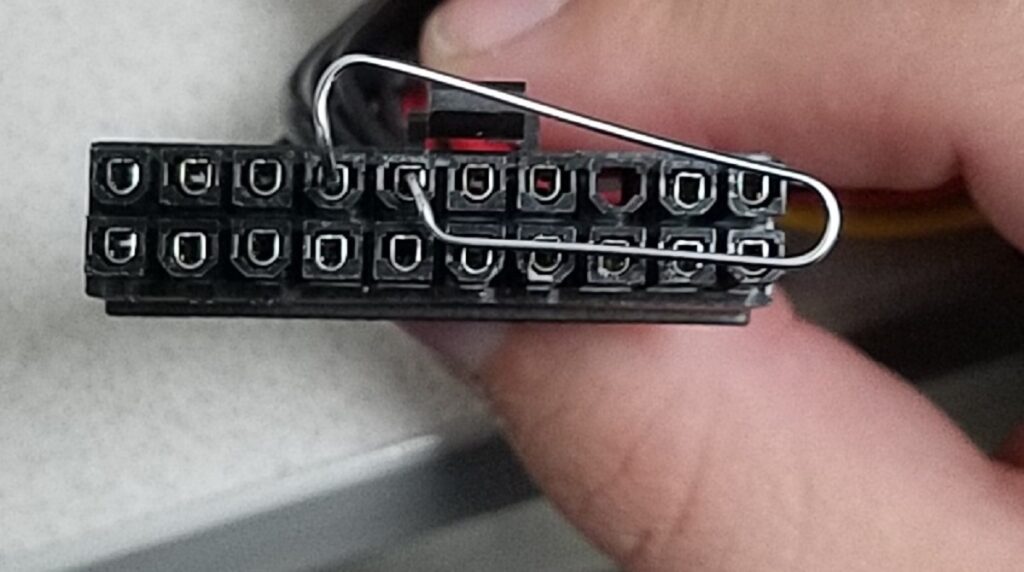
The paperclip test, also called the jumper test, lets you power on a PSU without connecting it to a motherboard. It’s the fastest way to confirm whether the unit can start at all.
What You’ll Need
- A metal paperclip (bent into a U-shape) or a dedicated PSU jumper
Step-by-Step Instructions
- Switch off the PSU using the rocker switch on the back, then unplug it from the wall.
- Disconnect all cables from the motherboard, GPU, drives, and any other components.
- Locate the 24-pin ATX connector, the large flat connector that would normally plug into the motherboard.
- Users must identify pins by their physical position on the 24-pin connector, not the wire color. Pin 16 is always the 4th pin from the left on the top row (looking at the connector from the wire side with the clip facing up).
- Insert your U-shaped paperclip into those two pins only. Double-check you’re bridging green to black, never connect green to red, yellow, or orange wires.
- Plug the PSU back into the wall and switch it on.
- Watch the fan: If the PSU fan spins and keeps running, the unit can power on. If nothing happens, the PSU is likely dead.
Important Limitations
The paperclip test only confirms that the PSU can turn on. It does not verify that it is delivering correct voltages, performing well under load, or that individual rails are healthy. For a thorough diagnosis, follow up with the multimeter method below.
Pro tip: Some modern PSUs use semi-passive or zero RPM fan modes. The fan may briefly spin at startup and then stop. This alone doesn’t mean the unit is faulty, it’s by design on units from brands like Seasonic and Corsair.
Method 2: Testing a PSU with a Multimeter (Most Accurate DIY Method)
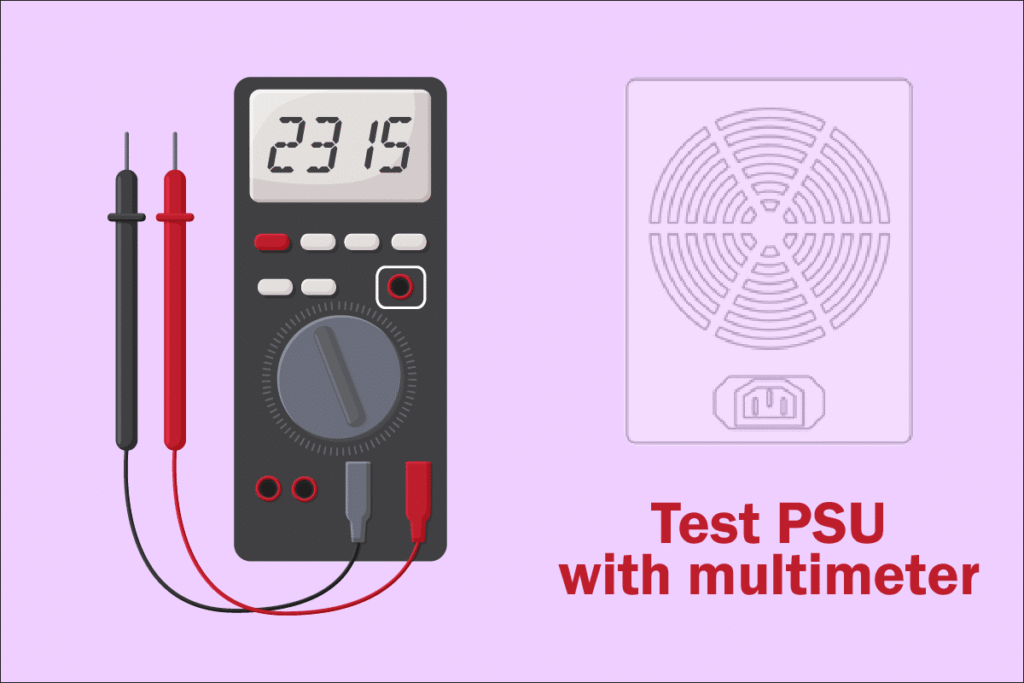
A multimeter gives you actual voltage readings across the PSU’s rails, the 12V, 5V, and 3.3V lines that power your components. I’ve tested this method with a basic £12 multimeter from Amazon, and it works very well for pinpointing voltage problems.
ATX Voltage Reference Chart
| Rail | Wire Colour | Expected Voltage | Acceptable Range (±5%) |
| +12V | Yellow | 12.0V | 11.4V – 12.6V |
| +5V | Red | 5.0V | 4.75V – 5.25V |
| +3.3V | Orange | 3.3V | 3.135V – 3.465V |
| Ground | Black | 0V | — |
- First, perform the paperclip test (above) so the PSU is powered on without a motherboard.
- Set your multimeter to DC voltage mode, look for the “V” symbol showing a solid and dashed line.
- Insert the black probe into any black wire (ground pin) on the 24-pin connector.
- Insert the red probe into a yellow wire (12V), red wire (5V), or orange wire (3.3V).
- Read the voltage on the screen and compare it against the chart above.
- Repeat for each rail you want to check.
Interpreting the Results
If any reading is outside the ±5% tolerance, the PSU is delivering unstable power. This can cause crashes, data corruption, and long-term damage to your components. A consistently low 12V rail, such as 11.2V under even a light load, is a serious red flag.
From my testing experience: I once diagnosed a system with random shutdown issues using this exact method. The 12V rail was reading 11.1V — well below the safe threshold. Swapping the PSU resolved every issue immediately. The multimeter approach helped avoid unnecessary component replacement.
Method 3: Using a Dedicated PSU Tester (Best for Ease and Speed)
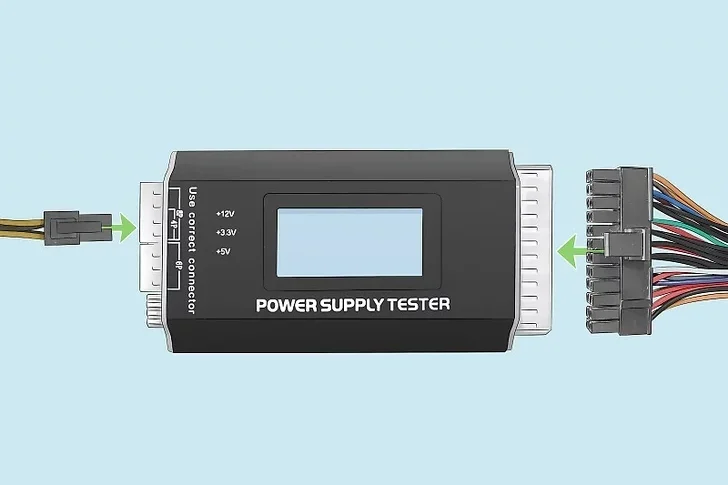
A dedicated PSU tester is the most user-friendly option, especially for people who regularly build or repair PCs. These handheld devices cost between £5 and £15 and test all voltage rails simultaneously, displaying readings on a small LCD screen.
How to Use a PSU Tester
- Shut off and unplug the PSU.
- Disconnect all modular cables from the PSU if applicable.
- Plug the 24-pin ATX connector into the tester, along with the 8-pin (4+4) CPU cable.
- Reconnect the PSU to the mains and flip the power switch on.
- Read the LCD display. Voltage readings for each rail will appear. Any value outside the safe range will typically trigger an alarm.
PSU Testers We’ve Tested
UNIT-T UT306 / Generic LCD PSU Testers (£7–£12)
- Easy to use, instant readings, no multimeter skill needed
- Tests 24-pin, 8-pin, SATA, Molex, and PCIe connectors
- Audible alarm for out-of-spec voltages
- Doesn’t test under real load, it’s a passive test
- Build quality is basic at this price point
Corsair PSU Tester (built-in self-test on iCUE-compatible units)
- Deeply integrated with Corsair HXi and AXi series
- Shows real-time wattage, temperature, and fan RPM
- Excellent software reporting via Corsair iCUE
- Only works with Corsair’s own smart PSU range
- Expensive entry point if you don’t already own one
Our verdict: For most users, a generic LCD PSU tester is the sweet spot. I’ve personally used a budget tester on a dozen builds, and it catches the majority of dead or struggling PSUs within seconds.
Method 4: Software Monitoring Under Load (Real-World Stress Testing)
If the PSU powers on fine but you suspect it’s struggling under load, software-based voltage monitoring combined with stress testing is your best bet.
Tools You’ll Need (All Free)
- HWMonitor or Open Hardware Monitor: Reads voltage rails via motherboard sensors
- AIDA 64: More detailed monitoring with logging
- Prime 95: Stresses the CPU to maximum load
- FurMark: Stresses the GPU
How to Run a Load Test
- Install HWMonitor and launch it.
- Note the current +12V, +5V, and +3.3V readings at idle.
- Run Prime95 and FurMark simultaneously for 15–30 minutes.
- Monitor the voltage readings throughout. If the 12V rail drops significantly (say, from 12.1V to 11.5V) under load, the PSU is struggling to deliver adequate power.
Limitations to Keep in Mind
Software monitors read sensor data from the motherboard, not directly from the PSU. Readings may be slightly inaccurate compared to a direct multimeter measurement. Use this method as a supporting check, not a standalone diagnosis.
PSU Tester Comparison Table
| Method | Cost | Accuracy | Skill Required | Tests Under Load? |
| Paperclip Test | Free | Low | Very Easy | ❌ No |
| Multimeter | £10–£30 | High | Moderate | ❌ No |
| Dedicated PSU Tester | £7–£15 | Medium | Very Easy | ❌ No |
| Software + Stress Test | Free | Medium | Easy | ✅ Yes |
| Combination (Multi + Load) | £10–£30 | Very High | Moderate | ✅ Yes |
Trusted PSU Brands Worth Knowing in 2026
If testing reveals your PSU is faulty, here’s what the current market looks like for reliable replacements. We’ve looked at brands consistently recommended by the community and trusted review outlets like Tom’s Hardware.
- Seasonic: Often considered the gold standard. Manufactures platforms for other brands. Their Prime and Focus series carry up to 12-year warranties.
- Corsair: Strong all-rounder. The RMx and HXi lines are particularly well-regarded, with excellent software integration.
- Be quiet!: Superb for silent builds. The Dark Power Pro series is a favourite among workstation builders.
- MSI: Growing presence with their MPG and MEG lines, now ATX 3.1 and PCIe 5.0 compliant for the latest RTX 50-series GPUs.
When replacing a failed PSU, always use a wattage calculator to size correctly. Most gaming builds sit comfortably between 650W and 850W, but high-end rigs with an RTX 5090 may need 1000W or more.
People Also Ask For
Use a paperclip test to see if it powers on, or a PSU tester to check voltages via the 24-pin connector.
Any reading outside ±5% of standard values (12V, 5V, 3.3V) signals a potential PSU failure.
Yes, via software monitoring, but removing it gives more accurate hardware test results.
It may be dead, or normal if it uses a zero-RPM mode where the fan doesn’t always spin.
A good PSU lasts 5–10 years; high-end models can last longer with proper conditions.
Final Words on Testing a PSU
A faulty PSU is one of the most misdiagnosed faults in PC building and repair. The good news is that testing one is easier than most people realise and far cheaper than replacing components unnecessarily.
Here’s a quick recap of the best approach:
- Start with the paperclip test: it takes two minutes and tells you if the unit can power on at all.
- Follow up with a multimeter to verify voltage rails are within spec.
- Add a stress test if you suspect the PSU only struggles under heavy load.
- Use a dedicated PSU tester if you regularly work on multiple machines, it’s worth every penny.
If your PSU fails any of these tests, check your warranty first. Brands like Seasonic, Corsair, and be quiet! offer solid coverage, and many units can be replaced via RMA without spending a penny.
Got questions about your specific setup? Drop them in the comments, we’re happy to help.
